Posts Tagged ‘gardening’

Ancho Chili Powder – Seed to Jar

Tuesday, September 27th, 2016

poblano-powder


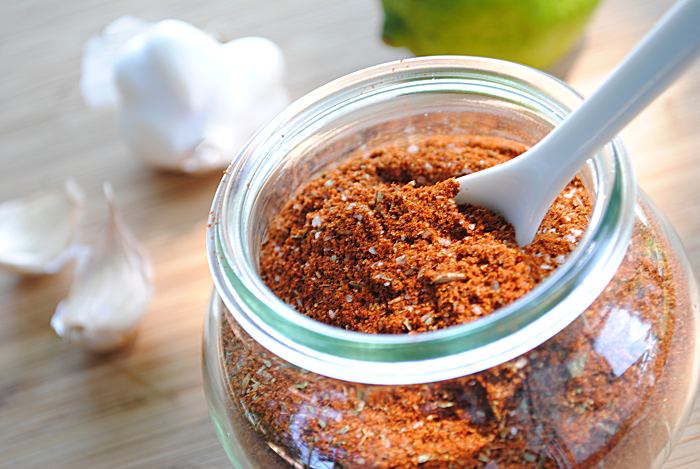
Technically, this is easy peasy. Throw dried ancho in a grinder and pulverize. Viola! Chili powder! I hope I never have to resort to store-bought powder again.  I wish you could smell it! It has a wonderfully fruity pepper aroma, like nothing I’ve ever found in a store.  I opened the grinder, took a big sniff, and immediately did this weird sneezy cough thing.  There is so much more going on in this simple powder than I could have imagined.

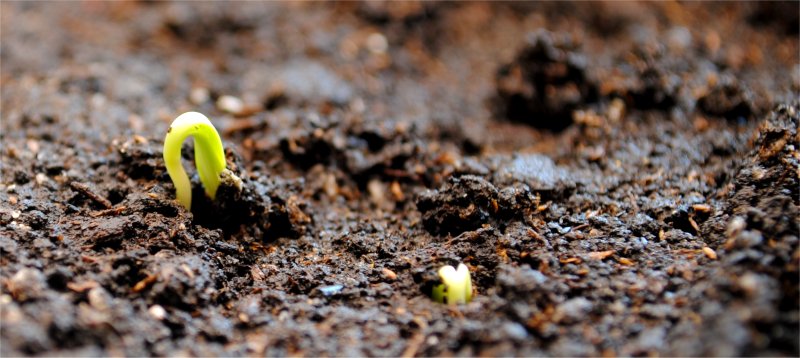
As far as easy peasy goes, I’ve decided to give myself a little more credit. This was a project that took some time, patience, and a little elbow grease.  I chose an heirloom poblano seed last winter, and planted the seeds back in early March.


sprout


pepper-seedlings


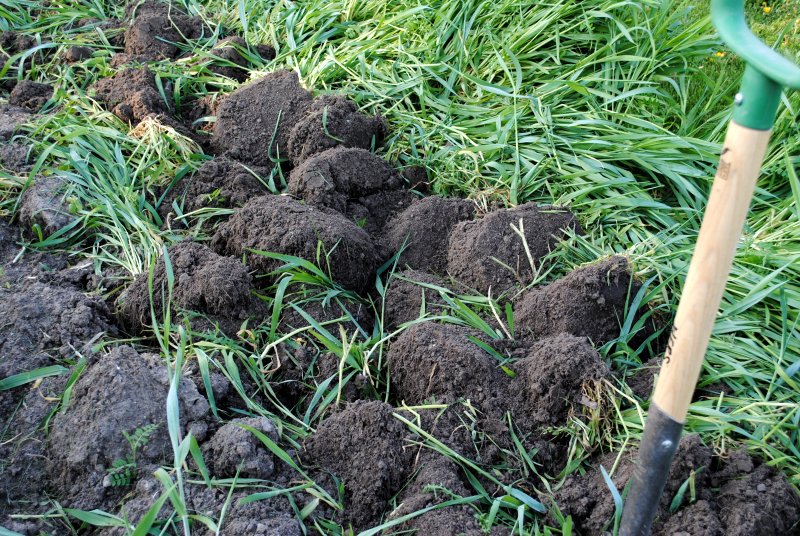
At the end of April, I turned over a cover crop of rye and vetch in my raised beds.  I hand dig all 4 of my raised beds, and by the time the cover crop had decomposed into the soil enough that I could plant, I had dug each bed a total of 3 times.  It’s a great way to start getting back into shape in the spring, and I’m usually a little sore at first. By mid May, I had transplanted the poblano pepper seedlings in the ground.


cover-digging


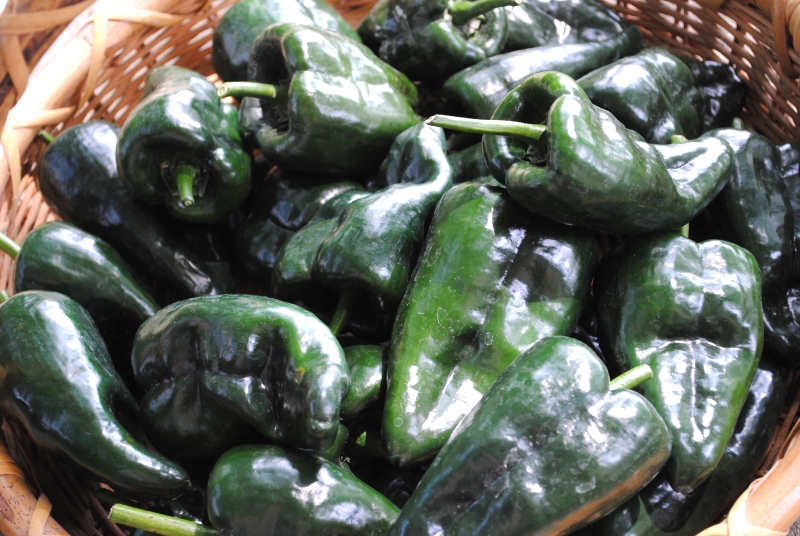
By the beginning of August, I was picking and roasting green chilis for the freezer


poblanos


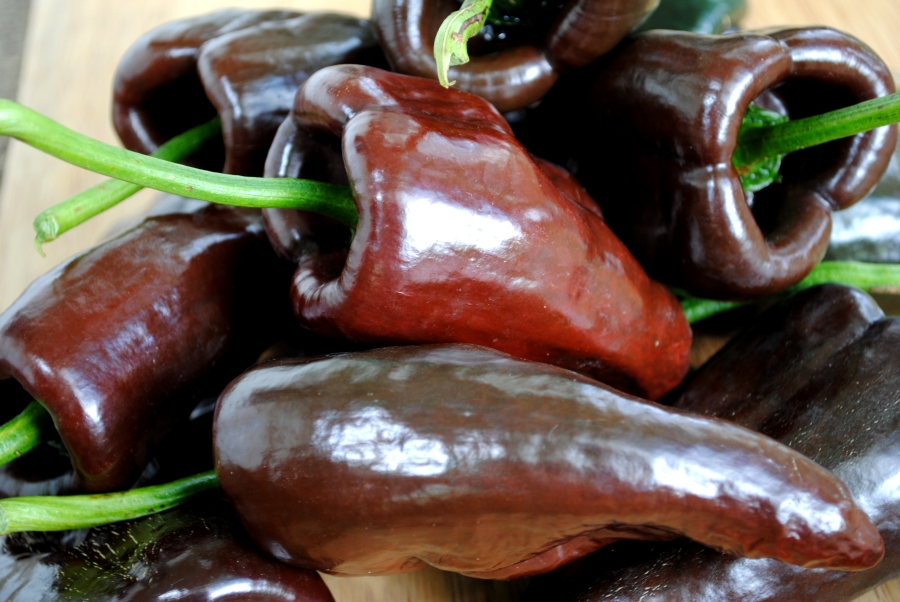
Here I am in September, and the peppers have finally ripened to a beautiful chocolate.


anchos


This past weekend, I halved and seeded them, and put them in my dehydrator. After a couple of days, they were shriveled, semi-crisp, and almost black.


polanos-dried


I’ll admit, I had my doubts when I put them in the grinder.  Who would have believed the powder would come out looking like this? One smell. One taste.  THIS is why I bother to do so much of what I do. This is what knowing where my food comes from is all about.  Now, whenever I cook something using this powder, I’ll be reminded of 7 months, from seed to jar, of what’s involved in producing a simple staple spice I keep in my cupboard.


poblano-powder


Now that I’ve finished this post, I’m off to use my spectacular ancho powder to make up a batch of my Tex-Mex blend.


taco-seasoning

Teenaged Chickens & Pickled Radishes

Tuesday, June 11th, 2013


chicken butts 2

The chicks aren’t chicks anymore.  They’re teenagers now. This morning when I let them out of the coop into the pasture, I noticed their chirpy little voices were interspersed with awkward, croaking clucks. Also, a few of the roosters have been attempting to crow, which is hilarious. I’m reminded of  the catching and cracking of the voice of a teenaged boy, as it transitions to a deeper, more manly sounding thing.

As you can see in the shot above, feeding time is very serious business. Whenever I make a trip out to the pasture, I’m practically mobbed, as they all come running up to see if I’m bringing more food.

chickens grazing

The roosters have begun to develop their tail feathers, and combs and wattles are coming along nicely. I ended up with 12 hens and 13 roosters.  When butchering time comes around, the largest guy with the most spectacular plumage, comb, and wattle (aka superior genetics) will get to stay on as the patriarch of my little flock.

rooster

On to the subject of radishes.  This past weekend I brought in my first major haul of the gardening season, and spent time in the kitchen putting some of it away for winter use.

strawberry rhubarb

I made 3 small batches of strawberry vanilla jam, a batch of my Gingered Rhubarb Conserve, an arugula feta quiche for lunch, a pan of strawberry rhubarb crisp (my youngest son’s special request), and a big jar of pickled radishes.

jar of radishes

These are quick and easy refrigerator pickles, and my solution to a bunch of radishes that need to be pulled all at the same time.  I just can’t eat them all at once, and they don’t hold all that long.  I go with the more French garlic and tarragon flavor, but you could go with dill instead, or any other favorite herb for that matter.

Pickled Radishes
Radishes
Garlic
Tarragon Sprigs
Peppercorns
Vinegar
Water
Salt

Stuff a jar with cleaned and trimmed radishes, several whole garlic cloves, sprigs of tarragon, and a teaspoon or so of peppercorns.  I like my radishes whole, but they can be sliced.  Fill the jar to cover all of the radishes with a solution of half vinegar, half water, and salt.  I use about 1 tablespoon of salt per 2 cups of solution, but it’s a good idea to adjust to your personal taste.  Let the jar sit in the refrigerator for a few days before eating.  The pickling solution will pull all of the red out of the radishes.  This is what mine looked like in less than an hour.

pickled radishes

Growing Pea Shoots

Saturday, April 20th, 2013

I’ve been intrigued by recipes I’ve been seeing for pea shoots.   However, pea shoots are not something I’ve ever seen in any of my local markets, so I did a quick bit of searching online. It turns out growing pea shoots is a snap!  Yeah, I know that was a bad pun. This little project was satisfying on so many levels. I’ve been dying to get out and start planting my early spring garden, but the last two weeks of monsoon-like rains have prevented it.

Day 10

I’ve had a couple of these wide, shallow dollar store bowls lurking in my cupboard for years, and they’ve never really gotten much use.  It turns out they’re perfect for some quick indoor growing projects.  When I’m done writing this blog post, I’m going to go get the other bowl and get some radishes started.

I had a big bag of sugar snap pea seed I had saved from the garden a couple of years ago.  I put some of them in a glass of water and soaked them for 4 or 5 hours.  Then, I filled my bowl with some growing mix I had stored in a bucket in my basement.  I scattered the pea seeds across the surface, covered them with more of the soil, watered them in, and then put the bowl under my grow lights.

Day 1

Talk about instant gratification… this is what I had 4 days later.

Day 4

7 days later ……

Day 7

… and here we are 10 days later, ready to cut the top couple of inches of growth, easy peasy! Yes, another bad pun.  According to the reading I did, I should be able to cut them again in another week or so.  It will be interesting to see how many times I can cut them.  Now, I just have to decide which way I want to try eating them first.  I’ll let you know how it goes. Now, I’m off to locate that other bowl and some radish seed I know I’ve got left over from a couple of years ago.

Day 10

Winter Garden Tunnel

Sunday, October 30th, 2011

Yesterday my guys spent some time helping me get the garden ready for winter.  I cleaned up the raised bed that grew our tomatoes, eggplant, and peppers, and then sowed a winter cover crop of hairy vetch and winter rye in their place.  The cover crop will overwinter and resume growing in the spring, when I will turn it into the soil.  Tomatoes are heavy feeders, and it’s crucial to return nutrients to the soil at every opportunity.  While I was working on fall clean up, the guys erected a winter tunnel so we can continue to eat from our garden into the winter months.

The tunnel was constructed of reclaimed/recycled materials. The cattle panels (used for the structure of the tunnel) were my buck pens from the days when I kept a small dairy goat herd. We did purchase a $70 roll of 6 ml plastic, but there’s enough on the roll for the next 4 or 5 years.   The tunnel is crude and imperfect, as it was intended to be quick, temporary, and inexpensive.  It will be taken down in the spring, and then erected over a different raised bed next fall.  In the picture above you can see the cattle panels, anchored in place against the sides of the raised bed by wooden stakes driven into the ground.  As you can see, the cattle panels form a slightly wonky shaped dome.  Below, the bottom edge of the plastic is about to be rolled onto a piece of lumber and nailed against the side of the raised bed.

The excess plastic at the corners was rolled and secured with zip strips we had lying around the barn.

Our prevailing winds come from the northwest, so the south end of the tunnel will be used for entry and venting.  I didn’t have it set up yet, but the plastic on this end will be anchored by a board and a couple of cinder blocks.  During the winter I will remove the board and be able to  lift the flap of plastic enough to vent the tunnel on warm days.

Here’s a peek inside the tunnel.  At the front are a couple of different varieties of heirloom kale, Tuscan Lacinato and Winter Red Russian. Growing up the cattle panel on the right are Oregon Sugar Pod II snow peas.

I found this guy living in the peas, and there was another one living in the kale.

I’m growing two varieties of spinach, Monstrueux De Viroflay and Gigante Inverno.  I’ve overwintered the first variety before, and it performed beautifully.  The lettuce between the two spinach varieties is Tom Thumb, an heirloom loose head lettuce.  Planted elsewhere in the tunnel are arugula, carrots, parsley, and some stray volunteer dill plants.  My carrots are not as fully formed as I would have liked.  It’s the first time I’ve tried to overwinter carrots, and I learned that I need to plant them about 3 weeks earlier than I did.  I’m hoping the added warmth of the tunnel will help them grow a little more before the real cold weather arrives.  This is the first year I’ve tried a tunnel like this, and if all goes well, I’m hoping we will be able to stretch our greens into January or February.

Season of Change – Fall Gardening

Saturday, August 20th, 2011

There is a definite change in the air, and a noticeable change in the length of the day and the angle of the sun. I’m used to the changes that come each year as summer ends, but this year is a little different.  My youngest son is starting his junior year of high school, and my oldest is starting his junior year of college.  Last weekend my oldest son moved out and into his own apartment. One down, one to go.  I’m a horrible mother…. I’m not one bit sad, and am happy to see him go. After all, isn’t this what the goal has been all along? To raise my boys into happy, responsible adults who can strike out on their own and thrive.  I love my kids, but my husband and I are coming to that point in our lives when we’re thinking about our own changes. We have things we put on hold to raise a family. We have things we want to do, places we want to go!

At this time of year,  gardeners are busy canning and preserving the summer’s bounty, and beginning to think about putting the garden to bed for winter.  I’m always amazed to see my gardening neighbors NOT take advantage of the opportunity to extend the harvest season by planting fall crops.

This morning was overcast and a little humid, the perfect morning to finish planting my fall garden.  Pictured above is a wall of climbing nasturtium growing in the center of one of my raised beds.  You can see my 6 foot tall San Marzano tomato plants in the background. The tomatoes are a late ripening variety, and are just now starting to turn pink. The picture below is another view of the nasturtium.  Earlier this summer you weren’t able to see much of the nasturtium because a row of spectacular Florence Fennel was towering above them to the right.  Along the left is a planting of green beans that are currently producing prolifically.  This year the green beans have me confused. They have usually begun to die off by this time of year.  Instead, they put on a second spurt of growth and are producing more beans than the initial crop 6 weeks ago.

Moving on to the raised bed where my nightshade family veggies are planted, the Italian heirloom eggplant, Listada de Gandia, are having a great year.

I love these eggplant! As well as being gorgeous, they’re some of the most flavorful I’ve ever grown.

The Chervena Chushka peppers, the  Bulgarian heirloom roasting peppers I planted from last year’s saved seed, are ripening. I see some pepper roasting in my near future.

The next raised bed is where my early spring garden was planted, and is now being transformed for fall and early winter. To the right you can see some cucumber vines (which are still producing prolifically), and to the left is a bed of parsley. In the middle is a lonely basil plant that was almost choked to death by some carrots that were harvested two or three weeks ago. New carrots have already been planted on the other end of this bed.  The bare spot in the foreground is planted with kale that will be harvested in late fall and early winter. I’ve talked my husband into helping me build a frame for a floating row cover, and am hoping to extend the kale well into winter. The kale variety is Winter Red Russian. This Cape Cod blogger reports harvesting Red Russian in February!

Around the corner to the other side of the bed are the snow peas I planted a couple of weeks ago. They should be ready to harvest in October.  Because there was a spring planting of peas here, I amended the soil with some compost before planting the new crop.

I’m not sure how much longer the cucumber will keep going.  At any given point in the last few weeks, you could find  10 to 20 pounds of these babies on my kitchen table. I’ve made salads, given them to friends and family, fed them to the chickens, and even thrown some on the compost pile.  If they don’t slow down soon, I’m going to have to yank them to make  room for the peas to climb the fence.  The spring peas were finished in time to be pulled to make room for the cucumbers, so it’s only fair that the cucumbers be sacrificed for the peas.

Fennel Success!

Wednesday, July 6th, 2011

I’m pretty excited about the Florence fennel I grew this year.  I’ve been experimenting with growing it for a couple of years, and this year I think I’ve got it figured out. I started the seed indoors back in March, and transplanted the seedlings into the garden in May.  I also dug quite a bit of compost into the soil, as fennel is a heavy feeder. The plants have had a couple of brushes with storms and high winds, which resulted in some strange twisty looking fronds, but overall I’m very happy with the results.  You probably don’t remember the scrawny little plants I showed you last fall.  Pretty pathetic, huh?

So, you should understand why I’m quite pleased to show you the first bulb I cut this afternoon. I figured I should get my hand in the shot for the sake of scale. Not bad for Hoosier grown fennel, if you ask me.  Hey man! Someone’s gotta toot my horn!

You ask, how do you use fennel?  Well, to begin with, I use it in place of celery.  Why?  Celery is an evil, vile vegetable, and I don’t know why anyone in their right mind would eat it when fennel is so much more tasty!  Also, my husband is allergic to celery. Here’s an Arugula Fennel Salad I made last summer, and Autumn Ham Soup with Pumpkin and Barley from last fall.  Now that I’ve cut my first bulb, I just might have to work on a new salad combination.  Stay tuned!

How Does Your Garden Grow?

Sunday, June 5th, 2011

I spent some time early this morning weeding and thinning the greens in my garden.  As I was weeding, I was struck by how new the garden felt. I plant many of the same things each year, and you would think the garden would be the same old, same old, year in, and year out.  Somehow it’s not. How is that?

Each year I watch the new seedlings begin to pop out of the ground and grow.  As they begin to reach their full size, I suddenly have the urge to start showing everyone their progress.  I feel like I’ve somehow achieved some sort of greatness.  It’s just plain weird.

The greens in my salad spinner above (from left to right) are Summer Perfection spinach (very heat tolerant), Petite Rouge lettuce (baby red romaine), Italian Arugula, and Tom Thumb lettuce (grows into tiny cabbage like heads). The lettuces are heirloom varieties from Baker Creek Heirloom Seeds.

Needless to say, my family will be having a large colorful salad with dinner this evening.

I’m also very excited that I will be able to pick peas shortly.  My Oregon Sugar Pod snow peas began blooming a couple of days ago.

I would love to show you my whole garden, but realize that it would be overkill, and this is meant to be a short post. I’ll just be happy with showing you the little Chelsea Prize English cucumber seedlings coming up among the volunteer dill plants.  What a perfect pairing! So tell me, how does your garden grow?

Seed Starting (AKA Anticipation!)

Wednesday, March 23rd, 2011

A couple of weeks ago I started collecting my seed starting paraphernalia in anticipation of the up coming gardening season. I’ve been starting my vegetable plants from seed for over 15 years thanks to this wonderful set of indoor plant lights my husband gifted me.  In the picture the stand is configured to 3 tiers, but in reality it’s a 4 tier stand.  Part of my preparations a couple of weeks ago  was cleaning up the houseplants, reconfiguring the stand to 4 tiers, and replacing the spent set of bulbs in the middle.

When my children were young and I wasn’t working a traditional job, I planted a HUGE garden.  Considering the size of my garden, starting my own vegetable plants from seed was very cost effective.  Additionally, seed starting has always provided me with a little encouragement as I’m trying to kick the end of winter doldrums, and find myself almost crazy for wanting spring and warmer temperatures. I suppose I look a little silly running my fingers through the dirt and petting my little green friends.

This past fall I saved some of my own tomato and pepper seeds for the first time, and I’m very interested in learning to save some of the more difficult seeds.  This first attempt at seed saving left me with a lot of questions, so recently I purchased a copy of  Seed to Seed: Seed Saving and Growing Techniques for Vegetable Gardeners. I would definitely recommend this book to anyone serious about saving seeds (insert Monsanto/GMO rant here).

In the foreground are San Marzano Redorta tomato seeds, an indeterminate heirloom variety.  In the background are my heirloom Chervena Chushka pepper seeds,  an absolutely sublime roasting pepper I wrote about last summer.

These days my vegetable garden is limited to three 6′ x 12′ raised beds (plus another raised bed herb garden), which allows for a three year crop rotation. I’m a busy person, and I’ve found that raised beds are much less labor intensive than what I used to do.  Also, the local soil is very heavy clay which comes with a host of challenges I’d rather not deal with. OK, back to seed starting. I use some inexpensive seed flats, some seed starting soil mix, and a few jiffy pots I get from a local farm supply store. I’ve also been known to make pots from newspaper, but the jiffy pots hold up better, and the nice neat grid of square pots appeases my OCD sense of organization. I place the seed starting mix in the pots, place 3 or 4 seeds in each pot, cover with a layer of soil, and wet the soil by pouring water into the bottom of the seed flats to wick upwards through the pots.

At this point I find myself wandering to the plant stand to look for the first tiny shoots of green at every opportunity. It’s crazy to look only a day after I’ve planted the seeds, but I just can’t help myself! The tomatoes were up within about a week, but the peppers drove me nuts.  They can take up to 2 weeks to germinate, and this time around they took 10 or 11 days.


I also started Listada de Gandia eggplant (seedlings pictured at the beginning of this post), an Italian heirloom variety I’m hoping to be able to save seed from. Lastly, I started some Fino Fennel, a bulb type of fennel. I started experimenting with fennel last year, and I’m still trying to learn how to grow it here in Indiana. I direct sowed it in the garden last spring, but it didn’t do well thanks to unseasonably hot dry weather. This year I’m experimenting with planting times as well as giving the plants a head start indoors.

An Unfortunate Ending

Saturday, October 2nd, 2010

My busy season in the shop is well underway, leaving me very little time for experiments in the kitchen.  In desperate need of some therapy, I decided to spend a little time in my fall garden the other evening. I love fall gardening, and I’m always a little amazed that most gardeners don’t take advantage of this time to extend their growing season. There are quite a few vegetables that thrive on the cooler temperatures leading into winter.

Here in northern Indiana spring jumped to hot summer temperatures so quickly that my snow peas did not do well.  However, a late summer planting resulted in beautiful peas that were ready to pick this week.  The variety is Oregon Sugar Pod II. I just love the way the vines end in these little twisty curls!

Another veggie I love to plant for fall harvesting, and also for overwintering, is spinach.  Unfortunately, I have nothing to show because my neighbor’s roaming German Shepherd dug it up ….. twice! I replanted after she dug it up the first time, and within a couple of days she came back and dug up the seed bed.

I tried a new vegetable this year, and I’ve learned a lot.  I sowed Florence Fennel seed directly in the garden early this spring, but the bulbs didn’t develop very well.  After some reading I discovered it might perform better if planted early to late summer so the bulbs could form and mature in cooler weather. I went ahead and planted some seed about mid summer, but the plants are still small.  Next year I’ll try planting earlier.  I use fennel in place of celery when I cook, but it’s rather expensive in the markets in my area. I have two reasons for using fennel. First, I think celery is an evil, vile tasting thing.  Secondly, my husband is allergic to celery.

When most plants are turning brown and beginning to to die, I have a couple of herbs that provide beautiful,  vibrant splashes of color in the garden.

Calendula.

Pineapple Sage.

My basil had a wonderful year. It’s has been lush and prolific, thriving in the sweltering heat this summer.  I’ve frozen boatloads of pesto, and have been sending it home with friends and family by the bushel.  Really, I’m not kidding…. literal bushels! Because it’s threatening to go to seed, and harboring hope that I might find one more chance to make another batch of pesto, I decided to cut it back one last time.  Look who I found guarding my basil! Isn’t he beautiful?

With no one to take the basil off my hands, it had to go on the compost pile.  Thus the title of this blog post ….. “An Unfortunate Ending”.